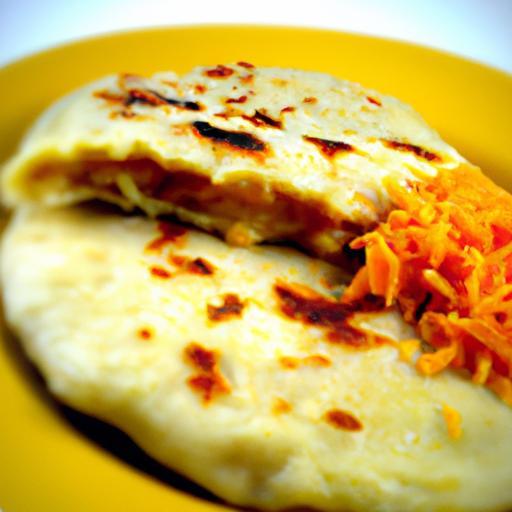
There’s nothing quite like biting into a warm, freshly made pupusa-the crispy, golden exterior giving way to a rich, gooey center, where cheese melts in all its savory glory. But what happens when that luscious cheese doesn’t stay put, seeping and oozing out the sides, turning your perfect pupusa into a gooey, messy surprise? If you’ve ever wondered why pupusas burst and let their cheesy treasure escape, you’re not alone. In this article, we’ll dive into the science and secrets behind these delicious Mexican treats, exploring the art of pupusa-making and uncovering the reasons why your cheese might be making a great escape. Prepare to meet your pupusas-and their cheese-like never before!
- Understanding the Science Behind Pupusa Cheese Leakage
- Choosing the Right Cheese for a Perfect Pupusa Fill
- Techniques to Seal Your Pupusas Without Cheese Escape
- Tips for Cooking Temperature and Timing to Prevent Bursting
- Prep and Cook Time
- Yield
- Difficulty Level
- Ingredients
- Instructions
- Chef’s Notes
- Serving Suggestions
- Q&A
- Key Takeaways
Understanding the Science Behind Pupusa Cheese Leakage
When making pupusas, mastering the art of cheese filling means understanding the delicate science that governs cheese behavior under heat. Cheese leakage happens because of moisture content, fat composition, and melting characteristics. Mozzarella, a traditional choice, melts beautifully but also releases whey that can force the dough to burst if not handled carefully. Choosing cheese with the right moisture balance and melting point is crucial in preventing those frustrating cheese leaks that turn your pupusas into cheesy puddles.
Choosing the Right Cheese for a Perfect Pupusa Fill
Selecting the perfect cheese for a pupusa filling is more than personal preference-it’s about consistency and meltability. Opt for semi-firm cheeses with moderate moisture; such cheeses melt smoothly yet don’t create excess liquid that weakens the dough’s structure. Traditional Salvadoran quesillo works wonderfully, but for those outside the region, a blend of mozzarella and mild farmer’s cheese balances melting with firmness. Avoid overly soft or aged cheeses that separate fat and moisture excessively when heated.
Techniques to Seal Your Pupusas Without Cheese Escape
The art of sealing the pupusa hinges on dough thickness and edge technique. Roll your masa dough to an even half-inch thickness, gently place a moderate amount of cheese in the center, and carefully fold edges over, pinching them firmly to enclose the filling. A second gentle press to flatten into a patty ensures the cheese rests comfortably inside. Lightly dusting your hands and surface with masa harina prevents dough from sticking while keeping the edges intact. For extra security, a quick crimp or twist of the dough edges can create a strong cheese barrier.
Tips for Cooking Temperature and Timing to Prevent Bursting
Cooking temperature is a silent hero or culprit in pupusa cheese leakage. Preheat your griddle or skillet to medium heat-too hot and the dough cooks unevenly or bursts before the cheese softens; too low and the pupusa dries out, cracking open. Cook each side for about 3 to 4 minutes, watching for a golden-brown crust while ensuring the filling melts perfectly inside. Gently flipping with a wide spatula avoids rupturing the seal. Let the pupusas rest briefly off heat to cool and set, locking in the cheese before serving.
Prep and Cook Time
- Preparation Time: 15 minutes
- Cook Time: 15 minutes
- Total Time: 30 minutes
Yield
Serves 4 – Makes approximately 8 medium pupusas
Difficulty Level
Medium – Requires precise dough handling and cooking attention
Ingredients
- 2 cups masa harina (corn flour, for authentic texture)
- 1 ½ cups warm water (adjust as needed for dough consistency)
- 1 teaspoon salt
- 1 ½ cups shredded mozzarella cheese (or Salvadoran quesillo)
- ½ cup shredded farmer’s cheese (optional, for firmer texture)
- Masa harina for dusting
- Vegetable oil or non-stick spray for cooking
Instructions
- In a medium bowl, combine masa harina and salt. Slowly pour in warm water, mixing with your hands until a soft, pliable dough forms. Cover with a damp cloth and let rest for 10 minutes.
- Meanwhile, mix the mozzarella and farmer’s cheese in a separate bowl. Set aside.
- Divide dough into 8 equal balls. Lightly dust your work surface with masa harina to avoid sticking.
- Flatten a dough ball into a ¼-inch thick disc, about 4 inches wide. Place 2 tablespoons of the cheese blend into the center.
- Fold dough edges up around the cheese, pinching tightly to seal all openings. Gently press flattened to about ½-inch thickness, ensuring the filling remains encased.
- Heat a cast-iron skillet or non-stick griddle over medium heat and lightly grease with oil or spray.
- Cook pupusas for 3 to 4 minutes on each side until golden brown and slightly crispy, flipping carefully with a spatula.
- Remove from heat and let rest for 2 minutes to allow cheese to set before serving.
Chef’s Notes
- Experiment with cheese: Combining mozzarella with farmer’s cheese helps reduce moisture-based leakage.
- Dough hydration is key: Too wet dough weakens the seal; add water gradually.
- Don’t overfill: Excess cheese is a direct cause of bursting. Moderation avoids mess.
- Resting dough: Resting improves elasticity for easier sealing.
- Make ahead: Pupusas freeze well-freeze sealed pupusas on a baking sheet before transferring to bags.
Serving Suggestions
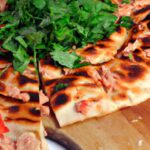
Serve your perfectly sealed pupusas hot with traditional curtido-a tangy cabbage slaw-or drizzled with crema fresca. Garnish with fresh cilantro and a wedge of lime for a vibrant contrast. Pair with a homemade tomato salsa for an authentic touch that perfectly complements the melty cheese filling. Warm up tamarind or hibiscus drinks to round out this Salvadoran feast.
| Nutritional Info (per pupusa) | Calories | Protein | Carbohydrates | Fat |
|---|---|---|---|---|
| Estimated | 220 kcal | 10 g | 28 g | 7 g |

For more tips on traditional Latin American dishes, check out our Salvadoran Recipes. Learn about ingredient science and food safety at the FoodSafety.gov website.
Q&A
Q: Why do pupusas sometimes burst open while cooking?
A: Pupusas burst open primarily because the masa dough isn’t properly sealed around the filling. When the cheese inside heats up, it melts and expands, creating pressure that forces the dough to split. Think of it like a tiny balloon-if there’s a weak spot, the filling will escape!
Q: Is the type of cheese causing the leak?
A: Absolutely! Some cheeses melt more aggressively than others. Cheeses with high moisture content, like fresh mozzarella or string cheese, tend to liquefy and ooze out more easily. Using a firmer, drier cheese like quesillo or a well-drained farmer’s cheese can help keep the filling inside.
Q: Could the dough consistency be the culprit?
A: Yes, the masa dough’s texture is key. If it’s too dry or crumbly, it won’t wrap securely around the cheese. Conversely, overly wet dough can be sticky and fragile, also prone to breaking. Finding the perfect balance-a pliable, slightly moist dough-helps cradle the cheese snugly.
Q: Does temperature impact pupusa leakage?
A: Temperature plays a big role! Cooking pupusas over too high heat can cause rapid steam buildup inside, leading to rupture. Cooking on medium heat allows the dough to cook evenly and the cheese to melt gently, reducing bursts. Patience is delicious!
Q: How can I prevent my pupusas from leaking cheese?
A: To keep your cheesy treasures intact, try these tips:
- Seal the edges of your pupusa dough tightly around the filling. Pinch and smooth any cracks.
- Use a cheese that melts well but isn’t overly watery. Consider drying or pressing fresh cheese before using.
- Cook on medium heat and flip carefully.
- Experiment with adding a pinch of masa flour to the cheese filling-this helps absorb excess moisture.
Q: Is a little leakage always bad?
A: Not at all! A tiny cheese escape can create a deliciously crispy, caramelized edge that some pupusa lovers crave. Just keep in mind, too much escape means lost flavor and a tricky mess. Balance is the secret sauce.
Q: Can I rescue a burst pupusa?
A: Definitely! If your pupusa bursts while cooking, serve it up anyway-sometimes the leeched cheese caramelizes into a tasty crust. Or, scoop up the loose cheese and enjoy it as a dip alongside. Sometimes, pupusa accidents are the best kind of happy accidents!
Q: What’s the culinary magic behind a perfect pupusa?
A: The magic lies in harmony: the masa’s elasticity, the melting dance of cheese inside, and the gentle kiss of the griddle heat. When these elements unite, each bite delivers creamy, chewy, and crispy bliss-no bursts required. Practice and patience will unlock your pupusa mastery!
Key Takeaways
As you perfect your pupusa-making skills, remember that a little cheese escape isn’t always a flaw-it’s a sign of molten, gooey goodness that’s just too eager to share its rich, comforting flavor. Understanding why your cheese bursts out helps you tweak your technique, from dough thickness to cheese selection, ensuring every bite is a deliciously sealed treasure. So next time your pupusa leaks a little, don’t fret-embrace the sizzle, savor the stretch, and let those cheesy moments remind you that cooking is as much about the joy of discovery as it is about the final bite.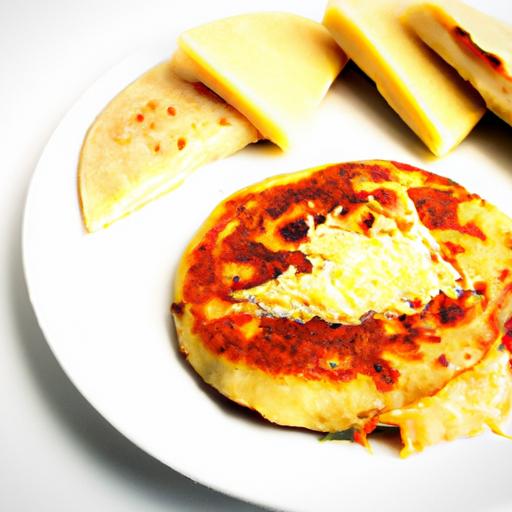


