In the vast tapestry of Indian snacks, few treats boast the perfect marriage of crunch and spice quite like chakli. This beloved spiral-shaped snack, with its golden hue and irresistible crispiness, has long been a festive favorite and an everyday indulgence alike. But what if you could skip the deep-frying and still savor that iconic crunch? Enter the baked chakli-a simpler, healthier twist on tradition that doesn’t compromise on flavor or texture. In this article, we’ll guide you through an easy baked chakli recipe that you can try today, bringing a delightful fusion of heritage and convenience right into your kitchen. Get ready to roll, shape, and bake your way to a crunchy delight!
- Crunchy Texture Secrets for Perfectly Baked Chakli
- Prep and Cook Time
- Yield
- Difficulty Level
- Essential Ingredients and Their Roles in Flavor Development
- Step by Step Guide to Achieving the Ideal Chakli Shape
- Tips for Serving and Storing Your Homemade Chakli Delight
- Chef’s Notes & Tips for Success
- Nutritional Information (Per Serving, approx.)
- Q&A
- To Conclude
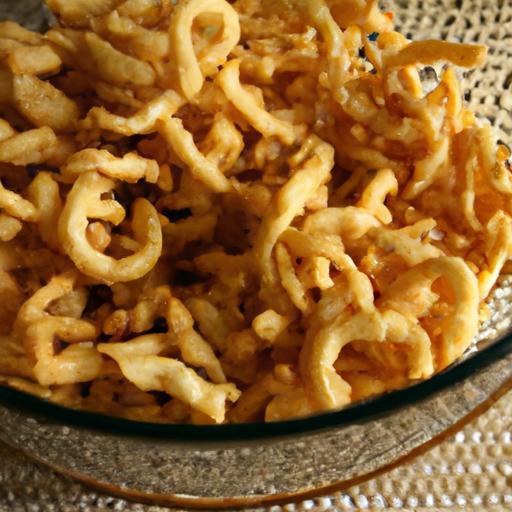
Crunchy Texture Secrets for Perfectly Baked Chakli
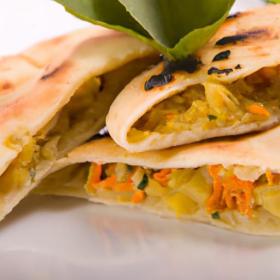
Crunchy Delight is much more than a snack; it’s a celebration of texture and flavor that invites you to discover the art of achieving the perfect bakers’ chakli. Originating from South India, chakli is a spiral-shaped, crunchy savory treat traditionally fried to golden perfection. Our baked version is a healthier, yet equally irresistible alternative that delivers that classic crispiness with a lighter touch-a true celebration of culinary finesse and innovation.
Prep and Cook Time
- Preparation: 20 minutes
- Resting Dough: 15 minutes
- Baking Time: 25-30 minutes
- Total Time: 1 hour 15 minutes
Yield
Makes approximately 40-45 chaklis, perfect for sharing or gifting.
Difficulty Level
Medium: Requires some shaping skill and precision for even baking.
Essential Ingredients and Their Roles in Flavor Development
- 1 cup rice flour: The primary base providing crispness and structure.
- 1/2 cup chickpea flour (besan): Adds a nutty depth and helps with binding.
- 1 tablespoon melted ghee or oil: Enriches flavor and aids in browning.
- 1 teaspoon sesame seeds: Contributes subtle crunch and a toasty aroma.
- 1 teaspoon cumin seeds: Infuses a warm, earthy undertone.
- 1/2 teaspoon asafoetida (hing): Enhances umami and digestive balance.
- Salt: Balances and intensifies all savory components.
- Warm water: To knead the perfect pliable dough for shaping.
Step by Step Guide to Achieving the Ideal Chakli Shape
- Prepare the dough: In a bowl, sift and combine the rice flour and chickpea flour. Stir in salt, asafoetida, cumin seeds, and sesame seeds.
- Add melted ghee: Pour in the melted ghee and combine until the mixture resembles coarse crumbs.
- Knead with warm water: Gradually incorporate warm water, kneading to form a smooth and firm dough that is not sticky but pliable enough to press through the chakli press.
- Fill the chakli press: Grease the chakli mold lightly, then fill it with dough to avoid sticking and uneven shaping.
- Shape the chakli: On a parchment-lined baking sheet, press the dough out in tight, continuous spiral shapes starting from the center, maintaining consistent pressure to preserve the delicate design.
- Rest before baking: Allow the shaped chaklis to rest for 10 minutes. This helps retain crispness and reduces shrinkage during baking.
- Bake to perfection: Preheat the oven to 350°F (175°C). Bake the chaklis in the middle rack for 25-30 minutes, flipping them halfway through. Look for a uniform golden-brown color and a crispy texture.
Tips for Serving and Storing Your Homemade Chakli Delight
- Serve freshly baked chaklis with a cup of spiced masala chai or as a festive nibble.
- Garnish with a sprinkle of chaat masala or a light dusting of powdered garlic for an elevated flavor experience.
- Store completely cooled chaklis in an airtight container to preserve crunchiness for up to 2 weeks.
- For longer storage, freeze the baked chaklis and reheat in a preheated oven for 3-4 minutes to crisp before serving.
Chef’s Notes & Tips for Success
- Flour Variations: Experiment with mixing a portion of millet or semolina flour for an interesting texture twist.
- Oil Alternatives: Substitute ghee with coconut oil for a delicately different aroma and richness.
- Perfect Pressing: Avoid overfilling the chakli mold to maintain clean edges and avoid dough spillage.
- Even Baking: Use parchment paper and flip midway to ensure even heat distribution and consistent crunch.
- Sticking Troubleshooting: If dough sticks to the press, lightly grease the mold between each chakli.
- Make-Ahead: Prepare and freeze raw shaped chaklis on the baking tray; bake directly from frozen, adding 5-7 extra minutes to the baking time.
Nutritional Information (Per Serving, approx.)
| Calories | Protein | Carbs | Fat |
|---|---|---|---|
| 110 kcal | 3 g | 18 g | 3.5 g |

Explore more Indian snacks: Check out our Crispy Kurkure recipe for another crunchy favorite. For in-depth nutritional information on chickpea flour and its benefits, visit Healthline.
Q&A
Q&A: Crunchy Delight – Easy Baked Chakli Recipe to Try Today
Q1: What exactly is chakli, and why is it so loved?
A1: Chakli is a traditional Indian snack-a spiral-shaped, crisp savory made primarily from rice flour, chickpea flour, and spices. Loved for its addictively crunchy texture and burst of flavors, chakli is a festive favorite and everyday teatime companion.
Q2: How does baked chakli differ from the traditional deep-fried version?
A2: Baked chakli takes the classic snack into a healthier realm by eliminating deep frying, which reduces oil and fat content. Despite being baked, it maintains that iconic crunch and spicy zest, making it a guilt-free indulgence.
Q3: Is baking chakli complicated for beginners?
A3: Not at all! This easy baked chakli recipe requires just a few simple ingredients and minimal equipment. With straightforward steps and a handy chakli press or piping bag, even novice home cooks can master this snack with ease.
Q4: Can I customize the spices in the baked chakli?
A4: Absolutely! The beauty of chakli lies in its versatile spice blend. Feel free to adjust chili powder, cumin, sesame seeds, or even add a hint of asafoetida and curry leaves for a personal flavor twist.
Q5: What flour combinations work best for baked chakli?
A5: Traditionally, a mix of rice flour and chickpea (besan) flour is ideal for that perfect crunch and structure. You can also experiment with millet or whole wheat flours for a different texture and nutritional boost.
Q6: How do I store homemade baked chakli to keep it fresh and crunchy?
A6: Once cooled completely, store your chakli in an airtight container at room temperature. This prevents moisture from dulling its crunch and keeps the flavors vibrant for up to two weeks.
Q7: Can this baked chakli recipe be turned gluten-free?
A7: Yes! Since rice and chickpea flours are naturally gluten-free, this recipe suits gluten-sensitive folk just fine-just be sure any added spices or ingredients are gluten-free certified.
Q8: What’s the best occasion to serve baked chakli?
A8: Baked chakli shines during festive celebrations like Diwali and Ganesh Chaturthi but is equally perfect as a daily snack, party appetizer, or crunchy companion to a hot cup of chai.
Q9: Any tips for achieving maximum crunch in baked chakli?
A9: To nail crispy chakli, ensure your dough isn’t too soft-firm yet pliable is key. Also, bake at the right temperature (around 180°C/350°F) until golden brown and allow them to cool fully on a wire rack.
Q10: Where can I find tools to shape chakli at home?
A10: Chakli presses or extruders are widely available online or at Indian grocery stores, often with multiple star-shaped discs to customize your spirals. Alternatively, use a sturdy piping bag with a star nozzle as a clever home hack.
To Conclude
As you’ve discovered, crafting the perfect chakli at home is simpler than it seems-and infinitely more rewarding. This easy baked chakli recipe brings together the crunch and spice you love, with a wholesome twist that’s gentle on the palate and the oven. Whether you’re hosting a festive gathering or simply craving a crispy snack, these golden spirals promise to delight every time. So why wait? Roll up your sleeves, embrace the aroma of freshly baked goodness, and let your kitchen transform into a crunchy haven. Your taste buds-and your guests-will thank you!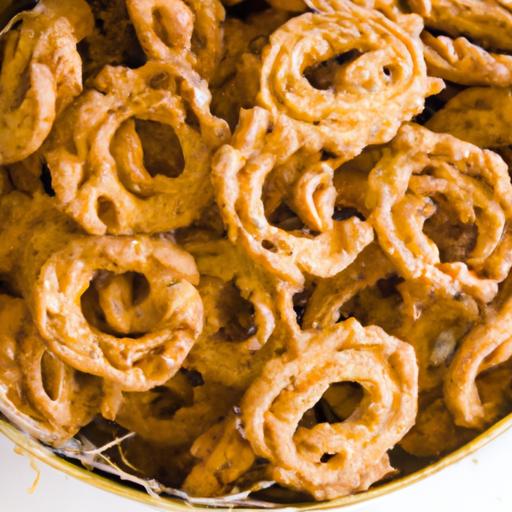


