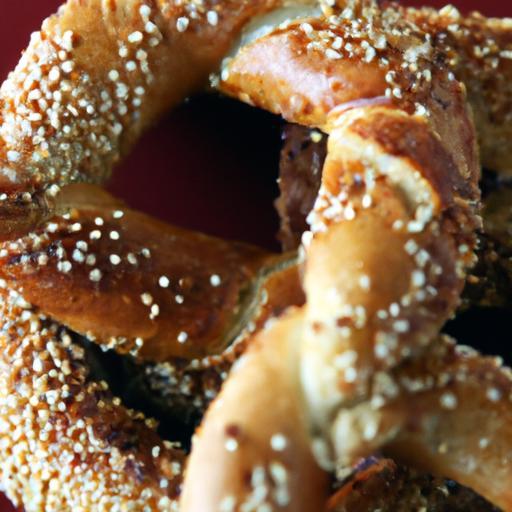
In the sun-drenched streets of Istanbul, the irresistible aroma of fresh, golden simit bread rings fills the air, inviting locals and travelers alike to pause and savor a timeless tradition. Known as the city’s beloved breakfast companion and a bustling market staple, simit embodies the perfect marriage of crispy crust and tender crumb, all wrapped in a signature twist of sesame-seed-studded dough. But what if you could bring this iconic Turkish treat right into your own kitchen? Welcome to “Twist & Taste: Mastering Turkish Simit Bread Rings at Home,” where we unravel the secrets behind authentic simit, guiding you step-by-step through the art of crafting these circular delights. Whether you’re a seasoned baker or a curious culinary adventurer, get ready to knead, shape, and bake your way to a taste of Istanbul, one crisp, sesame-kissed bite at a time.
Mastering the perfect simit dough is an art form that combines tradition with technique to create those iconic crisp, chewy Turkish bread rings that are beloved worldwide. Once you understand the nuances of dough hydration, gluten development, and the secret to that luscious glaze, you’re well on your way to producing authentic simit that boasts both texture and flavor worthy of any bakery.
The Art of Simit Dough: Secrets to Achieving the Perfect Texture
Starting with high-quality all-purpose flour and a judicious balance of yeast and warmth ensures a dough that’s elastic, slightly tacky, and capable of capturing those delightful bubbles during proofing. This delicate gluten matrix forms the robust yet tender backbone of the simit crumb. Incorporating a touch of sugar not only feeds the yeast but also enriches browning in the final bake.
Unlocking the Flavor: Traditional Glazes and Coating Techniques
The signature golden-brown crust is lovingly created by dipping each ring into a molasses and water mixture-known locally as pekmez-that’s combined with a little vinegar to enhance texture and sheen. This step is critical; it caramelizes subtly in the oven, giving simit its classic deep color and slight tang that perfectly offsets the toasted sesame seed coating. Drenching the dough thoroughly but not excessively is key to achieving that coveted crunch without sogginess.
Shaping Simit Rings Like a Pro: Step-by-Step Twisting and Forming Tips
Work with lightly floured hands and gentle urgency to divide the dough, roll each piece into long ropes about 16 inches long, then twist these ropes securely before joining the ends to form perfect rings. Ensuring uniform thickness throughout prevents uneven baking and contributes to the signature appearance-thick enough to retain a moist interior but slender for crisp edges. Practice and patience will perfect this graceful motion.
Baking to Perfection: Oven Settings and Timing for Authentic Simit Crunch
Place your simit on parchment-lined baking sheets and bake in a preheated oven at 450°F (232°C) for 15-18 minutes. This high heat is essential to activate the caramelization from the glaze and toast the sesame seeds deeply while locking moisture within the crumb. Rotating trays halfway through guarantees even cooking and consistent crunch. Let the rings cool slightly before sampling to allow the crust to set and reveal its full texture and aroma.
Prep and Cook Time
- Preparation Time: 30 minutes
- Proofing Time: 1 hour 30 minutes
- Baking Time: 15-18 minutes
- Total Time: Approximately 2 hours 15 minutes
Yield
- Makes 8 traditional-sized simit rings
Difficulty Level
- Medium: Requires some dough handling skills and timing awareness
Ingredients
- 4 cups all-purpose flour, sifted
- 1 ½ teaspoons active dry yeast
- 1 cup warm water (110°F/43°C)
- 2 tablespoons granulated sugar
- 1 teaspoon salt
- 3 tablespoons vegetable oil
- 1/3 cup pekmez (grape molasses)
- 1/3 cup water (for molasses glaze)
- 1 teaspoon white vinegar
- 1 ½ cups toasted sesame seeds
Instructions
- Activate the yeast: In a small bowl, mix warm water, sugar, and yeast. Let sit for 5-10 minutes until bubbly and frothy.
- Make the dough: In a large bowl, combine sifted flour and salt. Add the yeast mixture and vegetable oil, mixing with a wooden spoon until a shaggy dough forms.
- Knead the dough: Transfer to a lightly floured surface and knead for 8-10 minutes until smooth and elastic. If sticky, dust lightly but avoid adding too much flour to maintain softness.
- First rise: Place dough in an oiled bowl, cover with a clean kitchen towel, and let it rise in a warm spot for about 1 hour or until doubled in size.
- Prepare glaze and seeds: Whisk pekmez, water, and vinegar in a shallow dish. Spread roasted sesame seeds on a separate plate.
- Divide and shape: Punch down dough and divide into 8 equal pieces. Roll each into a long rope (~16 inches), fold in half, twist the two strands together, and join the ends firmly to form a ring.
- Glaze and coat: Dip each ring into the molasses glaze thoroughly, then immediately press it onto the sesame seeds, ensuring even coverage.
- Second rise: Place coated rings on baking sheets lined with parchment paper. Cover loosely and let rest for 20 minutes.
- Bake: Preheat oven to 450°F (232°C). Bake rings for 15-18 minutes or until deep golden brown and crisp.
- Cool and serve: Remove from oven, transfer to a rack, and let cool slightly before enjoying with your favorite spreads or cheeses.
Tips for Success
- Gluten development: Don’t rush kneading; it’s the foundation for that chewy, yet tender crumb.
- Knead in bursts: If your dough is sticky, wetting your hands as you knead prevents excess flour from drying your bread.
- Pekmez alternatives: If grape molasses is unavailable, use pomegranate molasses or a light honey, although flavor nuances may vary.
- Sesame seeds: Always toast fresh sesame seeds to intensify aroma and crispness.
- Make ahead: Simit dough freezes well after the first rise; thaw completely before continuing shaping and baking.
Serving Suggestions
Simit tastes extraordinary when served warm with a smear of tangy homemade ayran, fresh tomatoes, olives, and white cheese. Garnish with a sprinkle of crushed red pepper flakes or za’atar for a burst of Middle Eastern flavor. For a sweet twist, pair with creamy Turkish clotted cream (kaymak) and honey. Perfect for breakfast, a snack, or paired with tea for midday indulgence.
| Nutritional Info (per serving) | Calories | Protein | Carbs | Fat |
|---|---|---|---|---|
| Simit Ring | 280 kcal | 7 g | 48 g | 5 g |

Q&A
Q&A: Twist & Taste – Mastering Turkish Simit Bread Rings at Home
Q1: What exactly is a simit, and why is it so beloved in Turkish culture?
A1: Think of simit as Turkey’s flavorful answer to the bagel-a circular bread ring, crisp on the outside, soft and chewy inside, generously coated with crunchy sesame seeds. It’s a street food staple, beloved for its simplicity, affordability, and perfect partnership with tea. Simit isn’t just bread; it’s a cultural icon that brings people together at markets, cafés, and breakfast tables nationwide.
Q2: What are the key ingredients that give simit its unique texture and flavor?
A2: The magic of simit lies in its basic yet intentional ingredients: flour, yeast, water, sugar, salt, and a crucial dip in a mixture often made of molasses and water. This sweet and slightly tangy bath sets the stage for sesame seeds to stick and caramelize during baking, creating that signature golden crust-crunchy exterior meeting tender crumb.
Q3: Why do we dip the dough rings in molasses water before adding sesame seeds?
A3: This step is the secret handshake of authentic simit-making. The molasses-water soak not only helps the sesame seeds cling firmly but also adds a subtle caramelized flavor and vibrant color to the crust during baking. It’s like a sweet kiss of tradition that transforms ordinary dough into a city-bustling delight.
Q4: Can making simit at home be beginner-friendly?
A4: Absolutely! While traditional simit masters use wood-fired ovens and decades of practice, the home cook can achieve incredible results with patience and a few kitchen tricks. It’s about embracing the process-kneading, shaping, dipping, and baking-and letting the dough tell its story as it puffs and browns in your oven. Plus, homemade simit brings the warmth and aroma of Istanbul into your kitchen.
Q5: How do you achieve that perfect crispy crust and soft interior at home?
A5: The crispy exterior comes from the molasses dip and a hot oven (around 220°C or 425°F), paired with a good coating of sesame seeds. Baking on a preheated stone or heavy baking sheet helps mimic the stone ovens of Turkey, ensuring an evenly crunchy bottom. The interior stays soft by balancing hydration and not overbaking-aim for a golden hue with a slight sheen.
Q6: Are there variations of simit to try once you’ve mastered the classic?
A6: Definitely! Simit adapts beautifully to creativity. You can experiment with different toppings like poppy seeds, nigella seeds, or even everything bagel seasoning. Some add cheese inside or twist the dough with spices such as sumac or za’atar. For a sweet spin, try adding a touch of cinnamon and sugar to the dough before baking. The twist is, the taste is all yours to invent.
Q7: What’s the best way to enjoy your homemade simit?
A7: Fresh out of the oven is ideal-warm, fragrant, and sesame-crisped. Pair it with a strong Turkish tea, a smear of creamy feta or labneh, slices of fresh tomato and cucumber, or simply enjoy it plain as a satisfying snack on the go. It’s a taste and texture symphony that transports you straight to a bustling Istanbul street corner.
Q8: Any troubleshooting tips for common simit woes?
A8: If your simit turns out too dense, the yeast might be old or the dough under-kneaded-embrace some elbow grease and a lively rise. If the crust lacks color or crunch, double-check your molasses dip and oven temperature. And remember, shaping takes practice-don’t be discouraged by irregular rings; rustic charm is part of the simit’s homey appeal.
Q9: How long can you store homemade simit, and can you freeze it?
A9: Simit is best enjoyed fresh, ideally within a day or two at room temperature. To keep it fresh longer, wrap tightly and freeze for up to a month. Reheat in a hot oven or toaster oven to revive that crunchy crust and soft inside-like pressing rewind on a delicious trip to Turkey.
Q10: Where can one learn more or find authentic simit recipes?
A10: Dive into Turkish cookbooks, food blogs, and video tutorials for authentic guidance. Visiting Turkish bakeries or street vendors (if possible) offers invaluable inspiration. The beauty of simit is in its simplicity yet depth-once you master it, you hold a delicious key to Turkey’s culinary heart.
The Way Forward
As the warm aroma of freshly baked simit fills your kitchen, you’ll discover that mastering these golden, sesame-crusted bread rings is more than just a recipe-it’s a delightful journey into Turkish tradition and flavor. With each twist and turn of the dough, you don’t just create a snack; you craft a storied experience that connects you to centuries of culture and community. So, whether you savor your simit with a simple smear of butter, a dollop of creamy cheese, or alongside a steaming cup of Turkish tea, you’ve unlocked a delicious chapter of homemade artistry. Embrace the process, enjoy the taste, and let your kitchen become a bridge to the vibrant heart of Istanbul-one perfect simit at a time.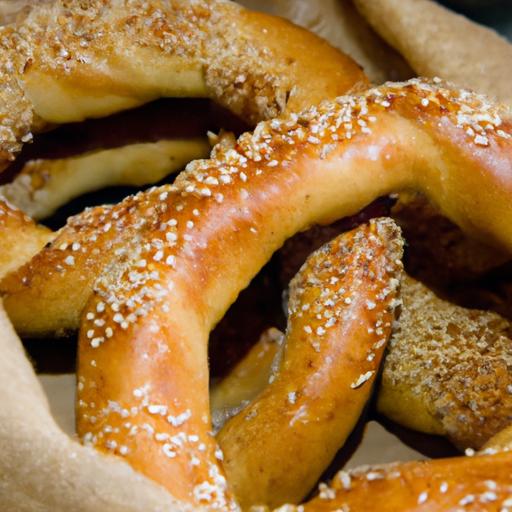


