There’s a magic in pierogi – those tender pockets of dough cradling savory or sweet fillings, a comfort food cherished across cultures. Yet, every home cook has faced the stubborn challenge: when pierogi dough refuses to yield, turning stiff and unworkable, the whole process stalls. What transforms resilient dough into supple, silky sheets ready to embrace fillings? In this article, we unravel the softening secrets behind pierogi dough, blending kitchen science with time-honored tips so your next batch stretches with ease and melts in the mouth. Prepare to turn frustration into finesse and bring your pierogi dreams to life.
When Pierogi Dough Refuses to Yield: softening secrets unlock the delicate balance between tradition and technique, transforming stubborn dough into tender perfection. This treasured Eastern European comfort food delights generations with its pillowy texture and savory fillings, yet even seasoned cooks encounter the challenge of dough that resists yielding to gentle shaping. Understanding why pierogi dough can become tough and learning the key ingredients and simple hacks to relax it not only ensures flawless results but also deepens your connection to this time-honored culinary art.
Prep and Cook Time
- Preparation: 20 minutes (plus 30 minutes resting time)
- Cooking: 10 minutes
- Total: 60 minutes
Yield
Approximately 24 medium pierogi (serves 4-6)
Difficulty Level
Medium – beginner-friendly with attentive resting and handling techniques
Ingredients
- 2 cups all-purpose flour, sifted
- 1/2 tsp salt
- 1 large egg, lightly beaten
- 3/4 cup warm water, plus extra for soaking
- 2 tbsp sour cream or Greek yogurt
- 2 tbsp unsalted butter, melted (optional for a softer touch)
Instructions
- Mix dry ingredients: In a large bowl, combine the sifted flour and salt. Form a well in the center.
- Add wet ingredients: Pour in the egg, warm water, and sour cream. Slowly incorporate the flour using a fork, gradually pulling flour from the edges into the liquid center.
- Knead the dough: Transfer to a lightly floured surface and knead for 8-10 minutes. You’ll notice the dough transforming from sticky and rough to smooth and elastic. If it feels dry, add a teaspoon of water at a time.
- Rest rigorously: Wrap the dough tightly in plastic wrap or place it in a sealed container. Refrigerate for at least 30 minutes. This critical rest period allows the gluten to relax, making the dough far more pliable and less prone to toughness when rolled.
- Optional soaking hack: If your dough already feels overly stiff, try briefly soaking it in a bowl of lukewarm water for 5 minutes, then gently pat dry before rolling. This gentle hydration softens the gluten network without making the dough sticky.
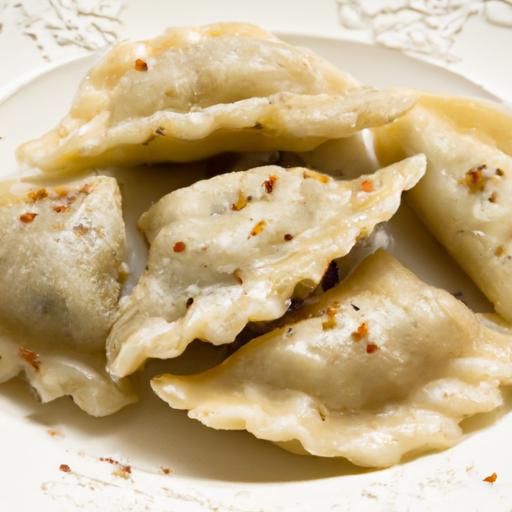
- Roll and shape carefully: On a floured surface, roll the dough to about 1/8-inch thickness. Use a 3-inch cutter to form rounds. Fill with your chosen filling, then fold and pinch edges firmly to seal.
- Cook with gentle care: Boil in salted water until pierogi float, about 3-4 minutes. Remove with a slotted spoon. For extra tenderness, sauté in butter until golden and slightly crisp-your pierogi will boast a delightful contrast of textures.
Tips for Success: Mastering Soft Pierogi Dough
- Flour choice matters: All-purpose flour is ideal, but blending with pastry flour can yield a softer crumb.
- Hydration is key: Slightly warmer water ensures better gluten development and dough pliability-avoid cold water that can stiffen the dough.
- Rest is non-negotiable: Never skip the resting phase. It’s the secret weapon to transforming tough, resistant dough into soft, malleable goodness.
- Opt for sour cream or yogurt: Fat incorporated via these ingredients tenderizes the dough naturally, enriching both flavor and texture.
- Handling the dough: When rolling, use minimal flour to avoid drying out the dough. Light dusting prevents sticking yet keeps dough soft.
- Reviving stubborn dough: If you find yourself with overworked dough-tight and resistant-wrap it in a damp kitchen towel and let it rest at room temperature for 15-20 minutes before proceeding.
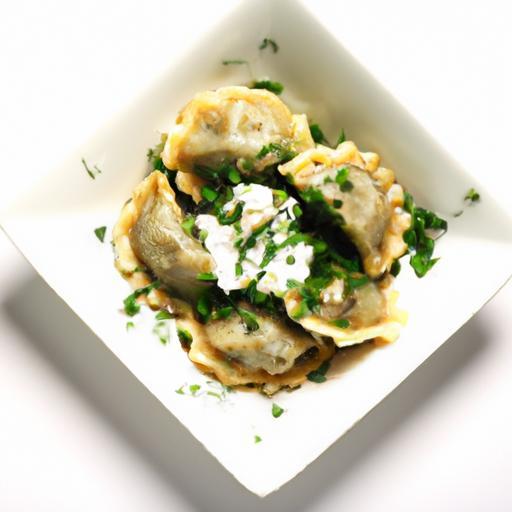
Serving Suggestions
Serve your tender pierogi fresh from the pan, drizzled with melted butter and sprinkled generously with toasted onions . A dollop of sour cream or a side of tangy sauerkraut complements their rich flavors wonderfully. For a vibrant twist, garnish with freshly chopped chives or dill to add a pop of color and an herbal freshness.

Nutritional Information (per 6 pierogi)
| Calories | Protein | Carbs | Fat |
|---|---|---|---|
| 280 | 7g | 45g | 5g |
For more detailed dough techniques and recipes, explore our Ultimate Pierogi Making Guide. To delve deeper into gluten science, the King Arthur Baking Gluten Guide is an excellent resource.
Q&A
Q&A: When Pierogi Dough Refuses to Yield: Softening Secrets
Q1: Why does my pierogi dough feel tough and resist rolling out?
A1: Tough pierogi dough often means the gluten has been overworked or the flour-to-liquid ratio is off. Over-kneading develops too much gluten, turning the dough into a stubborn, tight beast. Alternatively, insufficient moisture makes the dough dry and unyielding. Both scenarios make rolling and shaping a challenge.
Q2: Can the type of flour impact the dough’s softness?
A2: Absolutely! Flour with higher protein content (like bread flour) forms more gluten, resulting in a firmer dough. For tender pierogi, all-purpose flour or a mix that includes a touch of cake or pastry flour can help keep things gentle and pliable.
Q3: Is there a secret ingredient that magically softens pierogi dough?
A3: Many home cooks swear by adding a spoonful of sour cream, yogurt, or even a touch of vodka to their dough. These ingredients tenderize gluten strands, making the dough silkier and easier to work with. Plus, sour cream adds a hint of tang that complements the filling perfectly.
Q4: How does resting the dough influence its softness?
A4: Resting is the unsung hero! Allowing the dough to rest for at least 30 minutes-ideally wrapped in a damp cloth-relaxes the gluten, like releasing a coiled spring. This softness makes rolling out effortless and helps avoid shrinking during cooking.
Q5: What if the dough still refuses to soften after resting?
A5: Time for a moisture intervention! Lightly knead in a teaspoon of water or softened butter, bit by bit. Be gentle; you want to coax the dough, not wrestle it. Afterward, give it another rest to let those ingredients work their magic.
Q6: Can temperature affect how the dough behaves?
A6: Yes! Cold dough tends to be stiffer, while room-temperature dough is more compliant. If your dough is chilly straight from the fridge, let it warm up slightly before rolling. This little tip can transform a rebellion into cooperation.
Q7: Any final tips for those battling unyielding pierogi dough?
A7: Patience and finesse are key. Use gentle hands, intermittent rests, and the right hydration. And remember, a bit of imperfection often leads to rustic charm-sometimes the dough’s stubbornness tells a story worth savoring as much as your filling!
In Summary
Mastering the art of pierogi dough is a delicate dance between patience, technique, and a few well-kept secrets. When your dough refuses to yield, remember that softness isn’t achieved by rushing-it’s coaxed out with gentle hands, the right ingredients, and a bit of kitchen wisdom. Whether it’s the precise water temperature, the delicate balance of flour, or the magic of resting time, each step brings you closer to that tender, pliable dough begging to be filled. So next time your pierogi dough plays hard to get, embrace the challenge as part of the culinary journey. After all, every perfect pierogi begins with dough that knows how to give just the right amount-not too much, not too little, but exactly enough to create a delicious embrace for your favorite fillings. Happy cooking!


