There’s something mesmerizing about a perfectly bubbly pizza crust-its golden, airy bubbles tell stories of patience, precision, and that magical dance between flour and yeast. Mastering the art of bubbly pizza crust dough at home is more than just a culinary skill; it’s a gateway to pizza perfection that delights both the eyes and the palate. Whether you’re a home cook yearning to replicate pizzeria-quality dough or a curious foodie eager to understand the science behind those irresistible bubbles, this guide will take you on a journey through time-tested techniques, expert tips, and simple ingredients. Get ready to transform your kitchen into a fragrant haven where dough rises with character and every bite bursts with texture and flavor.
Master the Art of Bubbly Pizza Crust Dough at Home
Master the art of bubbly pizza crust dough at home by diving into the fascinating science that transforms simple ingredients into a golden, airy masterpiece. Perfecting a pizza crust that boasts light, ethereal bubbles is not just an art-it’s a science that begins with flour selection and culminates in ideal proofing and baking techniques. Whether you’re channeling authentic Neapolitan vibes or honing your own signature crust, this guide will inspire confidence in your dough-making skills, ensuring each slice arrives with that coveted, puffy, bubble-rich personality.
Prep and Cook Time
Preparation Time: 20 minutes
Proofing Time: 1 hour 30 minutes (including bulk and second rise)
Baking Time: 7-10 minutes
Total Time: Approximately 2 hours
Yield
Serves 2 large bubbly-crust pizzas (about 10-12 inch each)
Difficulty Level
Medium – requires some patience and attention to fermentation details
Ingredients
- 3 ½ cups (450g) bread flour, sifted – high protein for gluten development
- 1 ¼ cups (300ml) lukewarm water (about 105°F)
- 2 tsp active dry yeast or instant yeast
- 1 ½ tsp fine sea salt
- 2 tbsp olive oil (extra virgin recommended for flavor)
- 1 tsp sugar or honey (optional – to feed yeast)
Instructions
- Activate the yeast: In a small bowl, dissolve the yeast and sugar in the lukewarm water. Allow it to bloom for 5-7 minutes until foamy. This step ensures your yeast is lively and ready.
- Mixing the dough: In a large bowl, combine the bread flour and salt. Slowly add the yeast mixture and olive oil, stirring with a wooden spoon until it comes together as a rough dough.
- Knead for gluten development: Turn the dough onto a clean surface and knead by hand for about 10 minutes until it becomes smooth and elastic. The dough will feel tacky but shouldn’t stick excessively.
- Bulk fermentation (first rise): Place the dough in a lightly oiled bowl, cover with a damp cloth or plastic wrap, and leave to rise in a warm spot for about 1 hour or until doubled in size. This fermentation stage is crucial for bubble formation-carbon dioxide gas created by the yeast will start building those bubbles inside the dough’s gluten network.
- Pre-shape and rest: Punch down the dough gently to release large gas pockets, then divide into two balls. Let them rest loosely covered for 20 minutes. This allows the dough to relax, making it easier to shape and preserving the delicate bubbles.
- Final shaping: Carefully stretch each ball into a 10-12 inch circle, employing a combination of your fingertips and knuckles to maintain the air pockets. Avoid using a rolling pin, which can deflate your precious bubbles.
- Second rise (proofing): Place the shaped dough on a floured pizza peel or parchment, cover lightly, and proof for an additional 20-30 minutes. This step boosts airy texture-your dough should feel soft and yield slightly when poked.
- Preheat and bake: Preheat your oven to the maximum temperature possible (ideally 500°F or higher) with a pizza stone or steel inside for at least 45 minutes. This high heat promotes rapid oven spring-the final burst of bubbles and rise during baking.
- Bake until golden and bubbly: Slide the pizza onto the preheated stone and bake for 7-10 minutes until the crust blistered, golden, and chewy with pronounced bubbles. Rotate halfway if needed for even color.
Tips for Success
- Flour choice: Bread flour, rich in protein, forms a strong gluten matrix essential for trapping gas bubbles that create crust lift and texture.
- Yeast precision: Use fresh yeast and avoid overproofing to prevent weakening gluten structure and collapsing bubbles.
- Hydration matters: A slightly wetter dough (around 65-70% hydration) encourages a more open crumb with larger bubbles-don’t be afraid to adjust the water slowly.
- Handling gently: Minimal handling post-proof helps preserve fragile air pockets; resist the urge to punch or flatten dough too aggressively.
- Baking surface: Preheat your stone or steel thoroughly to mimic the intense heat of professional pizza ovens, which is critical for oven spring and bubbly crust.
- Make-ahead option: Refrigerate dough overnight to develop even richer flavor and a more complex crumb structure; just bring to room temperature before shaping and proofing.
Serving Suggestions
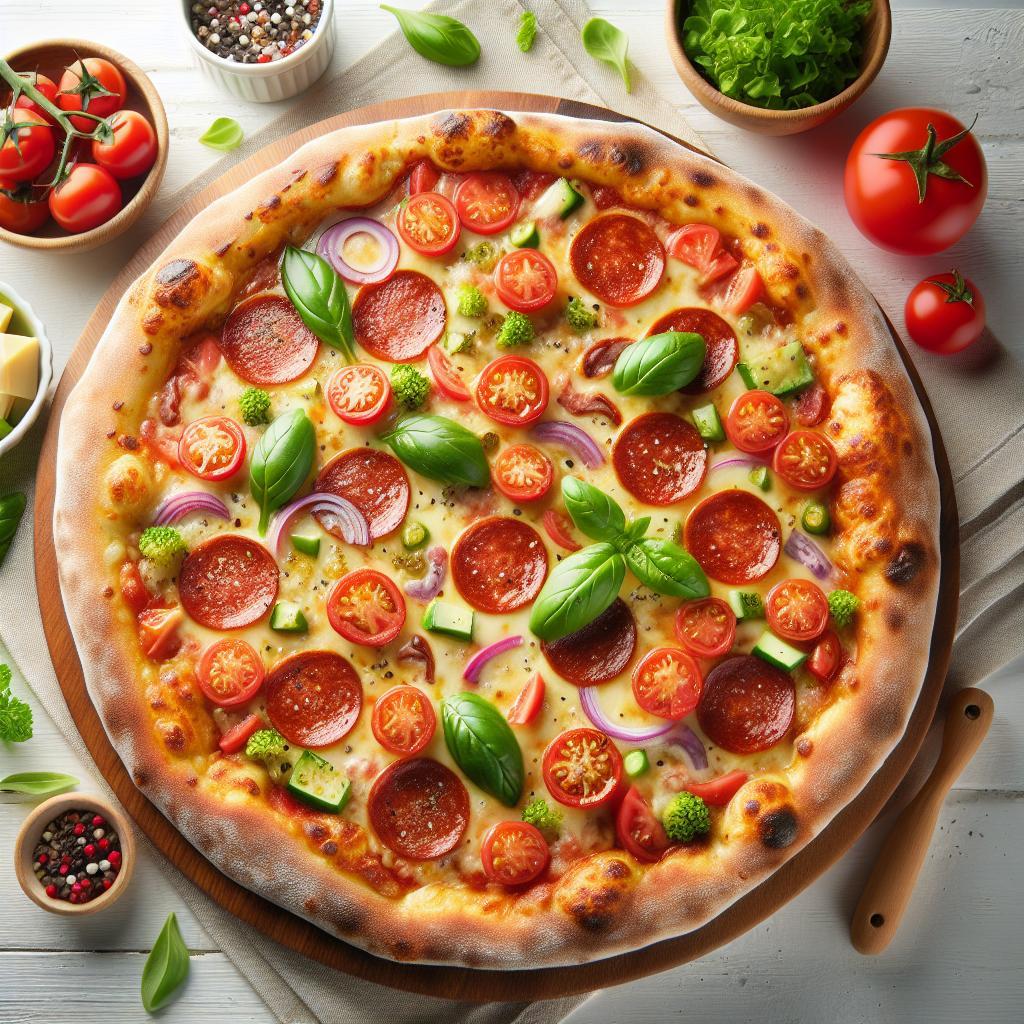
For a visually stunning and delicious bubbly pizza experience, emphasize your fresh, airy crust by topping with fresh mozzarella spheres, vibrant basil leaves, and a drizzle of extra virgin olive oil after baking. Complement the texture and flavor with a sprinkle of flaky sea salt and crushed red pepper flakes. Serve alongside a crisp green salad or a light Italian white wine to balance the richness.

| Nutrient | Per Serving (1 pizza) |
|---|---|
| Calories | 450 kcal |
| Protein | 13 g |
| Carbohydrates | 80 g |
| Fat | 7 g |
For those eager to enhance their dough skills further, explore our Artisan Pizza Dough Techniques guide. Additionally, the ScienceDirect article on yeast fermentation and dough rheology provides in-depth insight into the biological processes shaping your perfect bubbly crust.
Q&A
Q: What makes a pizza crust “bubbly,” and why is it so desirable?
A: A bubbly pizza crust is characterized by large, airy pockets that give a light, crisp texture with a slight chew-a delightful contrast to the toppings. These bubbles are the result of well-developed gluten strands trapping carbon dioxide produced by yeast during fermentation. The bubbles not only add texture but create an artisanal look and amplify the crust’s flavor through the Maillard reaction during baking.
Q: How do I start mastering the art of bubbly pizza dough at home?
A: Begin with high-quality ingredients-especially flour with a high protein content, like bread flour or ’00’ flour. Use fresh yeast and pay attention to hydration: a relatively wet dough (around 70-75% water by weight) promotes better bubble formation. Mix gently, let the dough ferment slowly at a cool temperature, and give it plenty of time to rise. Patience is your best friend here!
Q: Why is hydration so important for bubbly dough?
A: Hydration affects the dough’s extensibility and ability to trap gas. Higher water content makes the dough more fluid and tender, allowing bubbles to expand easily without bursting prematurely. While wetter doughs can be tricky to handle, the payoff is a crust bursting with spectacular, uneven bubbles.
Q: Can I achieve bubbly dough with just a quick yeast rise?
A: Quick rises can produce a decent dough but won’t deliver those characteristic large bubbles. Slow fermentation-ideally an overnight rise in the fridge-develops complex flavors and fine-tunes gluten networks to trap gas naturally. This slow approach also helps digest sugars and proteins, making the dough easier to digest and tastier.
Q: What techniques help create bubbles during shaping?
A: Handle your dough gently-avoid heavy kneading after fermentation to preserve the gas pockets. Use the ‘stretch and fold’ method during early fermentation to build structure without deflating the dough. When shaping, stretch the dough gently by hand, leaving the outer edges slightly thicker to create airy pockets that puff up beautifully.
Q: How does baking method affect bubble formation?
A: High temperatures are crucial. A very hot oven (ideally 500°F/260°C or higher) quickly puffs the dough before bubbles collapse. Using a pizza stone or steel mimics hearth baking by distributing heat evenly, creating that ideal bubbly crust. Avoid overcrowding the oven and bake directly on the stone for best results.
Q: What common mistakes should I avoid in making bubbly pizza dough?
A: Avoid overworking the dough after fermentation, as this will deflate those precious bubbles. Don’t skimp on fermentation time-even busy schedules can benefit from fridge rises overnight. Also, using too little water or flour with low protein content can create dense, flat crusts instead of bubbly treasures.
Q: Any secret ingredients or tricks to elevate my bubbly pizza dough?
A: A pinch of sugar can feed the yeast, helping with bubble development and crust color, but don’t overdo it. Some pizzaiolos mix a bit of olive oil for tenderness and flavor, while others swear by a sprinkle of semolina on the peel to promote a crisp bottom crust. Experimentation is key-your perfect bubbly crust is your own art!
Q: How can I store and use leftover dough to preserve its bubbly potential?
A: Refrigerate your dough in a lightly oiled airtight container for up to 3 days to retain hydration and fermentation benefits. When ready to use, let it come to room temperature and handle gently to preserve the bubbles developed during storage. For longer storage, freeze the dough and thaw slowly overnight in the fridge.
Q: Why is mastering bubbly pizza dough considered an “art,” and how can home cooks embrace it?
A: Because bubbly pizza dough combines science with intuition-each batch responds differently to environment, ingredients, and handling. Embrace experimentation, trust your senses, and celebrate imperfections. With every bubbly crust you craft, you’re part baker, part artist, creating edible masterpieces that bring joy to the table.
To Conclude
As you’ve discovered, mastering the art of bubbly pizza crust dough isn’t just about ingredients-it’s about patience, technique, and a little bit of magic in the kitchen. With each rise and stretch, you’re not just crafting dough; you’re building the foundation for memorable meals and joyous shared moments. So gather your flour, yeast, and water, let the bubbles bloom, and bring that perfect, airy crust to life-right in your own home. Your next slice awaits, crisp, golden, and impossibly inviting. Happy baking!


