There’s something undeniably alluring about the golden crunch of a perfectly fried samosa-the crisp exterior giving way to a warm, flavorful filling that delights every bite. But what if you could enjoy that same satisfying crispness without the guilt of deep frying? Enter the world of baked samosas: where health meets heritage in a culinary marriage that doesn’t compromise on taste or texture. In this ultimate guide, we’ll unlock the secrets to creating irresistibly crispy and wholesome baked samosas, transforming a beloved snack into a nourishing treat that’s as good for your body as it is for your soul. Whether you’re a seasoned chef or a kitchen novice, prepare to embark on a flavorful journey that redefines tradition with every crunchy bite.
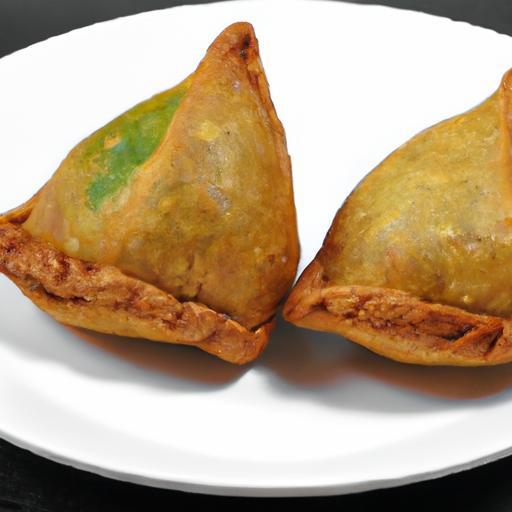
Crispy & Healthy baked samosa instantly transforms a beloved street snack into a guilt-free delight that’s as nourishing as it is flavorful. Originating from the vibrant kitchens of South Asia, the samosa’s charm lies in its delicate crisp exterior paired with a savory, spice-kissed filling. This recipe elevates tradition through smart baking techniques and innovative ingredients, promising flaky, golden pockets that satisfy both palate and wellness goals.
Prep and Cook Time
Preparation: 30 minutes
Cooking (Baking): 25 minutes
Total Time: 55 minutes
Yield
Yield: 12 medium-sized samosas (serving size: 3 samosas)
Difficulty Level
Medium – Perfect for passionate home cooks eager to master a healthier snack with professional flair.
Ingredients
- For the Dough:
- 1 ½ cups whole wheat flour, sifted
- 3 tbsp cold oil (vegetable or canola oil)
- ½ tsp salt
- ½ cup cold water, adjust as needed
- For the Filling:
- 2 medium potatoes, boiled, peeled, and mashed
- 1 cup green peas, fresh or frozen
- 1 small onion, finely chopped
- 1 tsp grated ginger
- 2 tbsp coriander leaves, chopped
- 1 tsp cumin seeds
- 1 tsp mustard seeds
- 1 tsp garam masala
- ½ tsp turmeric powder
- ½ tsp red chili powder (adjust to taste)
- Salt to taste
- 1 tbsp olive oil or any light cooking oil
- 1 green chili, finely chopped (optional)
Instructions
- Prepare the dough: Combine the whole wheat flour and salt in a large bowl. Drizzle cold oil while rubbing the mixture between fingertips until it resembles coarse crumbs. Gradually add cold water, mixing gently to form a smooth, firm dough. Cover and rest for 20 minutes.
- Cook the filling: Heat olive oil in a non-stick skillet over medium heat. Add cumin and mustard seeds; once they begin to pop, add finely chopped onion and ginger. Sauté until onion turns translucent, about 3-4 minutes.
- Add green peas, mashed potatoes, turmeric, chili powder, garam masala, and salt. Mix thoroughly and cook for 5 minutes, stirring occasionally. Sprinkle chopped green chili and coriander leaves in the last minute. Remove from heat and allow to cool.
- Shape the samosas: Divide the dough into 12 equal portions. Roll each into a smooth ball. On a lightly floured surface, roll each ball into an oval shape (about 6 inches in length). Cut it in half lengthwise to form two semi-ovals.
- Take one semi-oval, apply water along the straight edge with your finger. Fold it into a cone shape, sealing the edge by pressing firmly.
- Fill the cone with 1-2 tablespoons of the cooled potato-pea mixture. Wet the open edges and pinch them together to seal the samosa snugly, forming a triangular pocket.
- Bake for crispiness: Place samosas on a parchment-lined baking sheet. Lightly brush or spray each samosa with olive oil to promote golden crispiness. Preheat the oven to 400°F (200°C) and bake for 20-25 minutes. Flip halfway through to ensure even browning.
- Once golden and crisp, remove samosas from the oven and cool slightly before serving.
Tips for Success
- For an extra flaky crust, consider incorporating a tablespoon of yogurt into the dough for softness and tenderness.
- If you prefer a gluten-free option, try a dough made with chickpea flour blended with a bit of rice flour for structure.
- Ensure the filling is cool before stuffing to prevent the dough from getting soggy.
- To maintain crunchiness post-baking, store samosas in an airtight container and reheat in a toaster oven or air fryer.
- Experiment with fillings: try sweet potato and spinach for a nutritious twist or spiced lentils for protein boost.
Serving Suggestions
Crispy baked samosas pair wonderfully with tangy mint-cilantro chutney and cooling tamarind sauce. For a festive platter, arrange samosas on a wooden board garnished with lemon wedges, fresh coriander, and thinly sliced red onions. Complement with a hot cup of masala chai or chilled yogurt-based drink to balance the spices. Presenting samosas on colorful banana leaves can also enhance the traditional vibe and visual appeal.
| Nutrient | Per Samosa |
|---|---|
| Calories | 130 kcal |
| Protein | 3 g |
| Carbohydrates | 18 g |
| Fat | 4.5 g |
For more nourishing snack ideas that complement this baked samosa recipe, explore our detailed guide on Healthy Snack Recipes. For nutritional information on common spices and their health benefits, visit the NutritionValue.org website.

Q&A
Q&A: Crispy & Healthy – Your Ultimate Baked Samosa Recipe Guide
Q1: What makes baked samosas healthier than the traditional fried ones?
A1: Baked samosas ditch the deep-frying in hot oil, which cuts down on unhealthy fats and calories. Baking uses less oil and still delivers that golden, crispy texture. So, you get all the crunch with a lighter, more nutritious bite!
Q2: Can baked samosas be just as crispy as the fried version?
A2: Absolutely! The secret lies in the right dough, a light brush of oil or butter, and baking at a high temperature. This combo ensures a perfectly crisp shell that crackles delightfully with every bite-no greasy aftermath included.
Q3: What ingredients make your samosas both crispy and healthy?
A3: Whole wheat flour or multigrain flour are fantastic for the dough, boosting fiber and nutrients. For the filling, fresh veggies, lean proteins, and fragrant spices create a flavor-packed, wholesome bite. Plus, using minimal oil and natural ingredients keeps it clean and green!
Q4: How do you prevent the samosas from becoming soggy after baking?
A4: A few tricks! Make sure the filling isn’t too moist-steam vegetables lightly and drain excess water. Using a tight seal on your samosa edges also locks moisture in. Lastly, cool them on a wire rack to keep the bottom crisp instead of getting soggy from steam.
Q5: Can you customize the fillings for dietary preferences?
A5: Totally! Baked samosas are versatile-go vegetarian with spiced potatoes and peas, pack a protein punch with lentils or tofu, or create a fusion with quinoa and roasted veggies. Gluten-free options with alternative flours work too, so everyone can enjoy!
Q6: How long do baked samosas stay fresh, and what’s the best way to store them?
A6: Stored in an airtight container at room temperature, baked samosas stay crisp for about 1-2 days. For longer storage, refrigerate and reheat in the oven or toaster oven to revive that irresistible crunch. Avoid the microwave-it tends to make them soft.
Q7: What are some creative dipping sauces to pair with baked samosas?
A7: Classic mint chutney and tamarind sauce are always winners. For a twist, try yogurt raita infused with cumin and coriander, or a spicy roasted red pepper dip. The tangy and creamy contrasts elevate the samosa experience to delicious new heights.
Q8: Is baking samosas time-consuming compared to frying?
A8: Baking takes slightly longer-think 20-25 minutes versus a quick fry-but it’s mostly hands-off time, letting your oven do the work. This means less mess, less oil splatter, and more time to prep other parts of your meal or simply relax.
Q9: Can I prepare samosas in advance and bake them later?
A9: Definitely! Assemble and freeze uncooked samosas on a tray, then transfer them to a freezer bag. When ready, pop them straight into the oven (adding a few extra minutes) for a fresh-from-the-oven snack anytime you crave that perfect crispy treat.
Q10: What’s the biggest tip for nailing perfect baked samosas every time?
A10: Consistency and patience. Roll even-sized dough sheets, don’t overstuff the filling, seal the edges carefully, and trust your oven temperature. With these simple steps, you’ll be rewarded with golden, crunchy, and healthy samosas worthy of any feast!
Future Outlook
As the aroma of golden, flaky samosas fills your kitchen, you’ve unlocked the secret to a snack that’s as wholesome as it is delicious. This guide has taken you beyond tradition, blending crisp perfection with nourishing ingredients to create a baked samosa experience that satisfies both your cravings and your wellness goals. Whether you’re serving them at a family gathering or enjoying a guilt-free treat, these samosas prove that healthy eating can be irresistibly crispy and full of flavor. So, preheat that oven, roll up your sleeves, and embrace the art of baking samosas-a delightful journey where taste meets mindful nourishment, one crunchy bite at a time.


