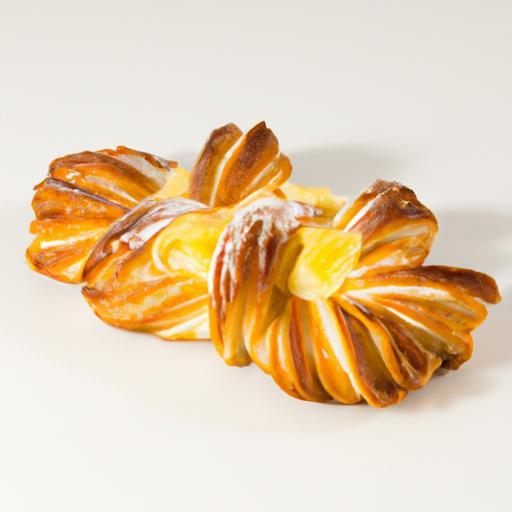
In the enchanting world of pastry, few creations capture the imagination quite like the Danish pastry-a symphony of buttery layers, delicate crunch, and tender crumb that dances on the palate. At the heart of this culinary marvel lies a technique both art and science: lamination. “Layered Perfection: Mastering Danish Pastry Lamination Art” invites you to embark on a journey through the meticulous craft of folding and rolling dough and butter into ethereal sheets that rise and flake with every bite. Whether you’re a seasoned baker or an aspiring enthusiast, understanding the secrets of lamination unlocks a realm where precision meets creativity, transforming humble ingredients into golden, flaky masterpieces. Join us as we peel back the layers-literally and figuratively-to reveal the magic behind Denmark’s most beloved pastry tradition.
Layered Perfection: Mastering Danish Pastry Lamination Art
Layered Perfection: Mastering Danish Pastry Lamination Art is more than just a baking technique; it’s a delicious science of creating delicate, flaky layers and tender crumbs that melt in your mouth. Rooted in centuries of European tradition, the Danish pastry’s allure lies in its intricate lamination process, where flour, butter, and careful temperature control come together to produce an irresistible puff pastry-like texture. Through years of culinary exploration, I’ve uncovered the secrets behind dough elasticity and butter incorporation that transform simple ingredients into a masterpiece you crave.
Prep and Cook Time
- Preparation: 2 hours (including resting and folding intervals)
- Cook Time: 15-20 minutes
- Total Time: Approximately 2 hours 30 minutes
Yield
Yields 10-12 perfectly laminated Danish pastries
Difficulty Level
Advanced: Requires precise technique and attention to detail but returns exquisite rewards
Ingredients
- 2 ½ cups all-purpose flour, sifted
- ⅓ cup granulated sugar
- 1 tsp salt
- 1 tbsp instant yeast
- ¾ cup whole milk, lukewarm (about 95°F/35°C)
- 1 large egg, room temperature
- 12 tbsp (1 ½ sticks) unsalted butter, cold but pliable
- Extra flour for dusting
Instructions
- Prepare the dough: Combine the sifted flour, sugar, salt, and instant yeast in a large mixing bowl. Stir to evenly distribute.
- Mix wet ingredients: Whisk the lukewarm milk and egg together.
- Combine and knead: Pour the wet mixture into the dry ingredients. Knead on a floured surface for 8-10 minutes until the dough is smooth, elastic, and slightly tacky. Avoid over-kneading which can toughen gluten.
- Shape and chill: Form the dough into a flat rectangle about 1-inch thick. Wrap in plastic and refrigerate for 30 minutes to relax and hydrate.
- Prepare the butter block: While the dough chills, place the cold butter between two sheets of parchment paper and pound with a rolling pin into a 7×7 inch square. Keep the butter cold but pliable-too soft, and it will bleed into the dough, too hard and it will break.
- Incorporate butter: Remove dough from fridge and roll it out into a 10×10 inch square on a lightly floured surface. Center the butter block on the dough, fold the corners of the dough over the butter, encasing it completely. Pinch the seams well to seal.
- Laminate with folds: Roll the dough-butter package into a 20×10 inch rectangle. Fold it into thirds (letter fold). Wrap and chill for 30 minutes.
- Repeat folds: Perform two more letter folds, chilling the dough for 20-30 minutes between each fold. This resting period ensures gluten relaxation and maintains butter temperature, critical to achieving even, flaky layers.
- Final roll and shape: After the last rest, roll the dough to desired thickness for shaping your Danish pastries. Keep the surface lightly floured and avoid over-handling.
- Bake and delight: Place shaped pastries on parchment-lined trays. Proof until doubled in size, about 45 minutes, then bake at 375°F (190°C) for 15-20 minutes or until golden brown and crisp.
Tips for Success
- Ingredient choice matters: Use high-gluten all-purpose flour to provide structure, and unsalted European butter for its ideal fat content and flavor.
- Temperature control: Keep all ingredients cool. Warm butter creates oily dough and compromises lamination.
- Dough elasticity: Gentle kneading builds gluten but resting between folds prevents over-tightening and tear-prone dough.
- Patience with resting times: Resting keeps the dough supple and lets the butter solidify for crisp, distinct layers.
- Use of a bench scraper: Helps manage dough edges cleanly without stretching or tearing.
- Make ahead: Dough can be prepared up to 24 hours ahead and kept refrigerated, baked fresh when desired.
- External resource: For an in-depth overview of lamination science, visit King Arthur Baking’s Puff Pastry Guide.
Serving Suggestions
Serve these magnificent Danish pastries fresh from the oven with a delicate dusting of powdered sugar or a soft drizzle of vanilla glaze. Pair with freshly brewed coffee or a creamy latte to highlight the butter’s richness. Garnish with fresh berries or thin slices of crisp apple for a bright contrast. For special occasions, fill the pastries with almond paste, cream cheese, or seasonal jams before baking to elevate their decadent layers.
| Nutritional Info (per serving) | Calories | Protein | Carbs | Fat |
|---|---|---|---|---|
| Danish Pastry Layered Perfection | 320 kcal | 6 g | 38 g | 15 g |

For further inspiration, explore our Puff Pastry Basics Guide to complement your Danish pastry expertise.
Q&A
Q&A: Layered Perfection – Mastering Danish Pastry Lamination Art
Q1: What makes Danish pastry lamination so special compared to other laminated doughs?
A1: Danish pastry lamination is a dance of buttery layers and yeasty softness. Unlike croissants, which focus on a flakier, crisp texture, Danish pastries strike a delicate balance between tender crumb and crisp, golden layers. The magic lies in its enriched dough-often with eggs and milk-giving a richer, more tender bite, while the lamination process creates those signature flaky tiers of buttery delight.
Q2: Why is lamination crucial to the Danish pastry’s texture?
A2: Lamination is the secret architect behind those ethereal layers. By folding butter into dough multiple times, you create countless thin barriers of fat interspersed with dough. When baked, steam from the moisture expands these layers, puffing them up like tiny edible skyscrapers. This process produces the Danish pastry’s signature lightness and crisp flakiness-without lamination, you’d have just a dense, buttery bread.
Q3: How do you achieve the perfect butter layer during lamination?
A3: Achieving butter perfection is like a culinary tightrope walk. The butter must be cold but pliable-too hard and it cracks the dough, too soft and it absorbs, losing layers. Chilling both dough and butter to similar temperatures, usually just above fridge-cold, ensures smooth, even folding. Using high-quality, high-fat butter also enhances flavor and the strength of the layers.
Q4: Can you explain the main lamination technique steps for Danish pastry?
A4: Absolutely! Start with a well-rested and chilled dough. Encase your softened butter block inside the dough’s center. Roll out the dough-butter package into a long sheet, then fold it triply-like folding a letter into thirds. Chill, then repeat the rolling and folding two to three more times, with resting intervals. Each fold multiplies the layers exponentially, creating that intricate pastry lattice.
Q5: What common lamination mistakes should beginners avoid?
A5: The classic pitfalls include using butter that’s too warm, causing it to seep out during rolling; rushing the resting periods, which leads to dough shrinkage and toughness; and uneven rolling, which breaks the butter layers and results in a patchy rise. Patience is key-work methodically and keep your ingredients at proper temperatures!
Q6: How does the fermentation process interplay with lamination in Danish pastry?
A6: Lamination sets the stage for layering, but yeast fermentation brings life to the dough. After lamination, proper proofing allows the yeast to gently expand the dough between those buttery layers. This controlled rise infuses the pastry with airy softness while enabling the layers to crisp beautifully during baking. It’s a harmonious duet of science and art.
Q7: Are there any creative twists on traditional Danish lamination techniques?
A7: Oh yes! Some bakers experiment by incorporating flavored butter-think cinnamon, citrus zest, or herbs-to infuse subtle layers of aroma. Others fold in nuts or seeds during lamination for a textured surprise. Even the shape can be a canvas: twists, braids, and pinwheels all showcase the layered marvels of laminated dough with flair and fun.
Q8: What’s the best way to practice lamination for Danish pastries at home?
A8: Start simple! Begin with a small batch and focus on mastering temperature control and folding precision. Use a ruler to roll even sheets and take notes on timing and dough feel. Watch your dough and butter temperatures closely and don’t rush-the lamination journey rewards patience with melt-in-your-mouth layers. And remember, every bake is a step closer to layered perfection!
Mastering Danish pastry lamination isn’t just baking-it’s crafting layers of buttery poetry. With practice, precision, and a little patience, you can create pastries that sing with flaky wonder and rich flavor-true layered perfection in every bite!
Future Outlook
As the final folds of butter and dough fuse into a golden, flaky symphony, mastering the art of Danish pastry lamination unveils more than just a delicious treat-it reveals a timeless craft where precision meets passion. Each layer tells a story of patience, skill, and the pursuit of perfection, inviting bakers to transform simple ingredients into edible works of art. Whether you’re a curious novice or a seasoned baker, embracing the nuances of lamination is your key to unlocking pastries that delight the senses and honor a rich culinary heritage. So, roll up your sleeves, dust off your rolling pin, and let the layers of your Danish pastry journey unfold-because in this artful dance of dough and butter, every fold brings you closer to layered perfection.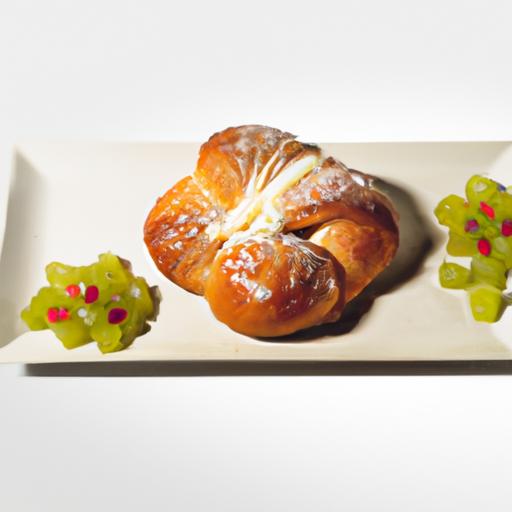


