There’s something magical about gathering around a blazing fire, the smell of sizzling meat in the air, and the unmistakable comfort of a crispy, melty braaibroodjie in hand. But what happens when that golden crust morphs into a burnt mess? Fear not, braai lovers! Whether you’re a seasoned grill master or a weekend warrior, knowing how to rescue a charred braaibroodjie can make all the difference between a culinary disaster and a delicious triumph. In this article, we’ll share clever tips and tricks to save your crust and keep your braaibroodjies perfectly toasted-because every bite counts, even when the flames get a little too enthusiastic.
When Your Braaibroodjie Burns: Tips to Save the Crust
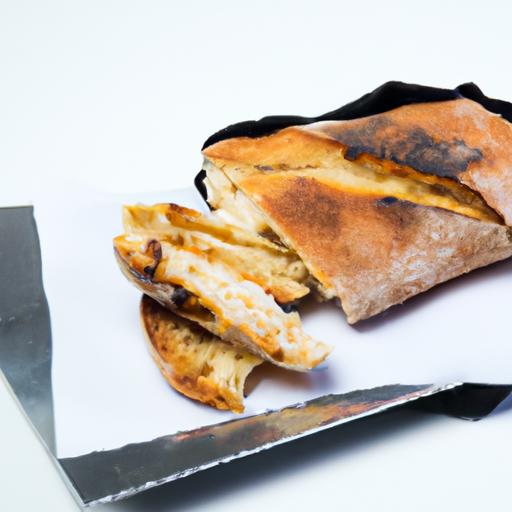
When your braaibroodjie burns, it’s more than just a minor kitchen mishap-it can feel like a culinary tragedy, especially with this beloved South African barbeque staple. Originating from the communal spirit of the braai, a braaibroodjie is a grilled sandwich known for its crispy, toasted bread and gooey, melted filling. Yet, the very element that makes it delicious-the golden crust-can easily tip into harsh bitterness with a little too much heat. Understanding heat control is your gateway to rescuing and mastering the perfect braaibroodjie with just the right balance of smoky flavor and toasty crunch.
Prep and Cook Time
- Preparation: 10 minutes
- Cooking: 8-12 minutes
- Total Time: 20-22 minutes
Yield
Serves 2 delicious braaibroodjies
Difficulty Level
Easy to Medium – perfect for braai novices and seasoned grill masters alike
Ingredients
- 4 slices of white or brown bread (day-old bread recommended for slight firmness)
- 2 tablespoons butter, softened
- 4 slices of boerewors slices
- 4 slices mature cheddar cheese
- 1 medium tomato, thinly sliced
- 2 teaspoons peri-peri sauce or your preferred spicy relish
- Fresh basil leaves or rocket (optional for freshness)
Instructions
- Preheat your braai or grill to medium heat-too high and your braaibroodjie crust will burn before the filling melts perfectly.
- Butter one side of each bread slice generously for an even, golden crust. Avoid spreading butter too thinly as uneven heating causes burning spots.
- Assemble your sandwich by layering cheese, tomato slices, and a drizzle of peri-peri sauce on the unbuttered side of two bread slices. Add basil or rocket if desired, then top with the remaining slices, buttered side facing out.
- Place the sandwiches on the grill over indirect heat if possible. Keep the grill lid closed to trap smoky flavors and melt the cheese evenly. Avoid placing directly over flames to prevent charring.
- Press the braaibroodjie lightly using a grill press or heavy spatula for even toasting and to bind the sandwich layers.
- Check and flip every 3-4 minutes to ensure each side browns slowly and evenly. This slow approach gradually develops a crisp crust without burning.
- If you spot burnt spots, move the sandwich to a cooler area of the grill and reduce direct heat; covering with foil for 1-2 minutes will help soften charred bits, making them easier to trim.
- Once the cheese is melted and both sides are perfectly golden brown, remove the braaibroodjie and let it rest for 1 minute before slicing.
Tips for Success: Creative Fixes to Rescue and Revitalize a Burnt Braaibroodjie Crust
- Lightly scrape burnt patches with the edge of a knife or coarse sponge once slightly cooled to avoid bitter flavors.
- Brush the crust gently with a little melted butter or olive oil to soften tough burnt areas and restore richness.
- Serve with a cooling condiment like minted yogurt or cucumber relish to counterbalance any lingering bitterness.
- Experiment with bread choice: denser breads like rye or sourdough tolerate heat better, providing a sturdier base less prone to burning.
- Use a heat diffuser or baking sheet on the grill grates to buffer direct flames and encourage even cooking-a favorite trick for avoiding burnt braaibroodjie crust.
Serving Suggestions
Slice your braaibroodjie diagonally for easy handling and an appealing presentation. Garnish with fresh basil, or a sprinkle of smoked paprika for extra flair. Serve alongside a crisp green salad or a tangy tomato and onion salad to balance the richness. Pair with an ice-cold local lager or rooibos iced tea for an authentic South African refreshment.
| Nutritional Info (per serving) | Calories | Protein | Carbs | Fat |
|---|---|---|---|---|
| Braaibroodjie with Cheese | 450 kcal | 20 g | 35 g | 25 g |
For a more in-depth guide on regional breads perfect for braaibroodjie, check out our Best Breads for Braaibroodjie post. To understand fire management further, consult National Geographic’s fire safety tips.

Q&A
Q&A: When Your Braaibroodjie Burns – Tips to Save the Crust
Q1: What exactly is a braaibroodjie, and why should I care about its crust?
A1: A braaibroodjie is the ultimate South African toasted sandwich, traditionally made on a grill (braai). The crust is the golden, crispy outer layer that holds all the melty, gooey goodness inside. That beautiful crust? It’s the first casualty when your braaibroodjie burns-meaning you risk losing flavor and texture in one fell swoop!
Q2: Oh no, I burned the crust! Is the braaibroodjie ruined?
A2: Not necessarily! A slightly charred crust can add a smoky flair, but if it’s burnt black, you’ll want to salvage what you can. Don’t toss it-there are clever tricks to save the crust (and your braaibroodjie!) without eating straight charcoal.
Q3: What’s the quickest way to “de-burn” my crust?
A3: First, gently scrape off the burnt bits with the edge of a knife or a stiff spatula. Be careful not to rip the bread. After that, pop the braaibroodjie back on the grill or in a pan on low heat for a minute-it’ll help revive a bit of crispness without further burning.
Q4: Can I mask the burnt taste if scraping isn’t enough?
A4: Absolutely. A light spread of butter or margarine can smooth out dry, burnt edges. Alternatively, smear a bit of tangy tomato relish or a creamy cheese spread-they’re flavor superheroes that can disguise slight charring and add moisture.
Q5: How can I prevent burning my braaibroodjie crust in the future?
A5: Keep your heat medium, and grill with patience-high flames will scorch before the filling warms. Use a cast-iron grid or place a sheet of foil with holes beneath your braaibroodjie for gentler heat. Flip often, and consider wrapping the sandwich in foil to ensure even, slow toasting.
Q6: Is there a way to rescue the filling if the crust is too burnt to salvage?
A6: Yes! Scrape out the filling, avoiding the burnt bread, and spread it onto fresh toast or a soft roll. Add a fresh leaf of lettuce or tomato slice for crunch, and you’ve reinvented the braaibroodjie into a fresh twist.
Q7: Any quirky tips for turning a burnt braaibroodjie into a new snack?
A7: Turn those burnt edges into crunchy croutons! Cut them up, toss with a little olive oil and seasoning, then toast until crispy. Perfect for sprinkling over salads or soups-a zero-waste snack born from braai mishaps.
Burnt braaibroodjie crust woes? Not the end of the world! With a little care and creativity, you can save your sandwich and keep the braai vibes alive and tasty.
The Way Forward
When your braaibroodjie burns and the crust edges toward charcoal territory, don’t despair-every smoky mishap is just another story waiting to be told around the fire. With a little patience, some clever tricks, and a touch of braai magic, you can salvage that golden crust or even transform it into a crispy delight. Remember, the secret to a perfect braaibroodjie lies not just in the heat, but in your hands and heart. So next time the flames get a bit too enthusiastic, embrace the opportunity to experiment, rescue, and savor every bite-because in the world of braais, every crust counts. Happy grilling!


